
TL;DR
A closet rig works best for reducing reflections and controlling noise when you focus on placement and acoustic dampening, not just foam. Proper ventilation is key to avoiding heat buildup, especially in sealed spaces. Strategic treatment and positioning make a huge difference in sound quality and noise control.
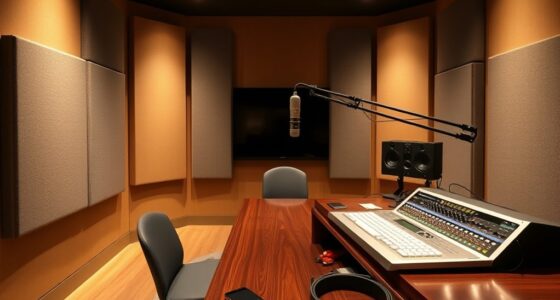
Imagine your perfect recording space. Now, realize you don’t need a dedicated studio—just a closet. It’s a tiny, cozy spot, but with the right tweaks, it can turn into a surprisingly effective vocal booth or audio workspace. The trick isn’t just slapping foam on the walls; it’s about smart placement, dampening reflections, and managing heat.
If you’ve ever sat in a tiny room, hearing your voice bounce, or struggled with noisy fans, you know that small spaces come with unique challenges. But they also pack a punch when it comes to sound control—if you approach it right. This guide will walk you through making your closet rig quieter, better sounding, and safe for long-term use. Ready to turn that cluttered corner into a professional-grade setup? Let’s dive in.
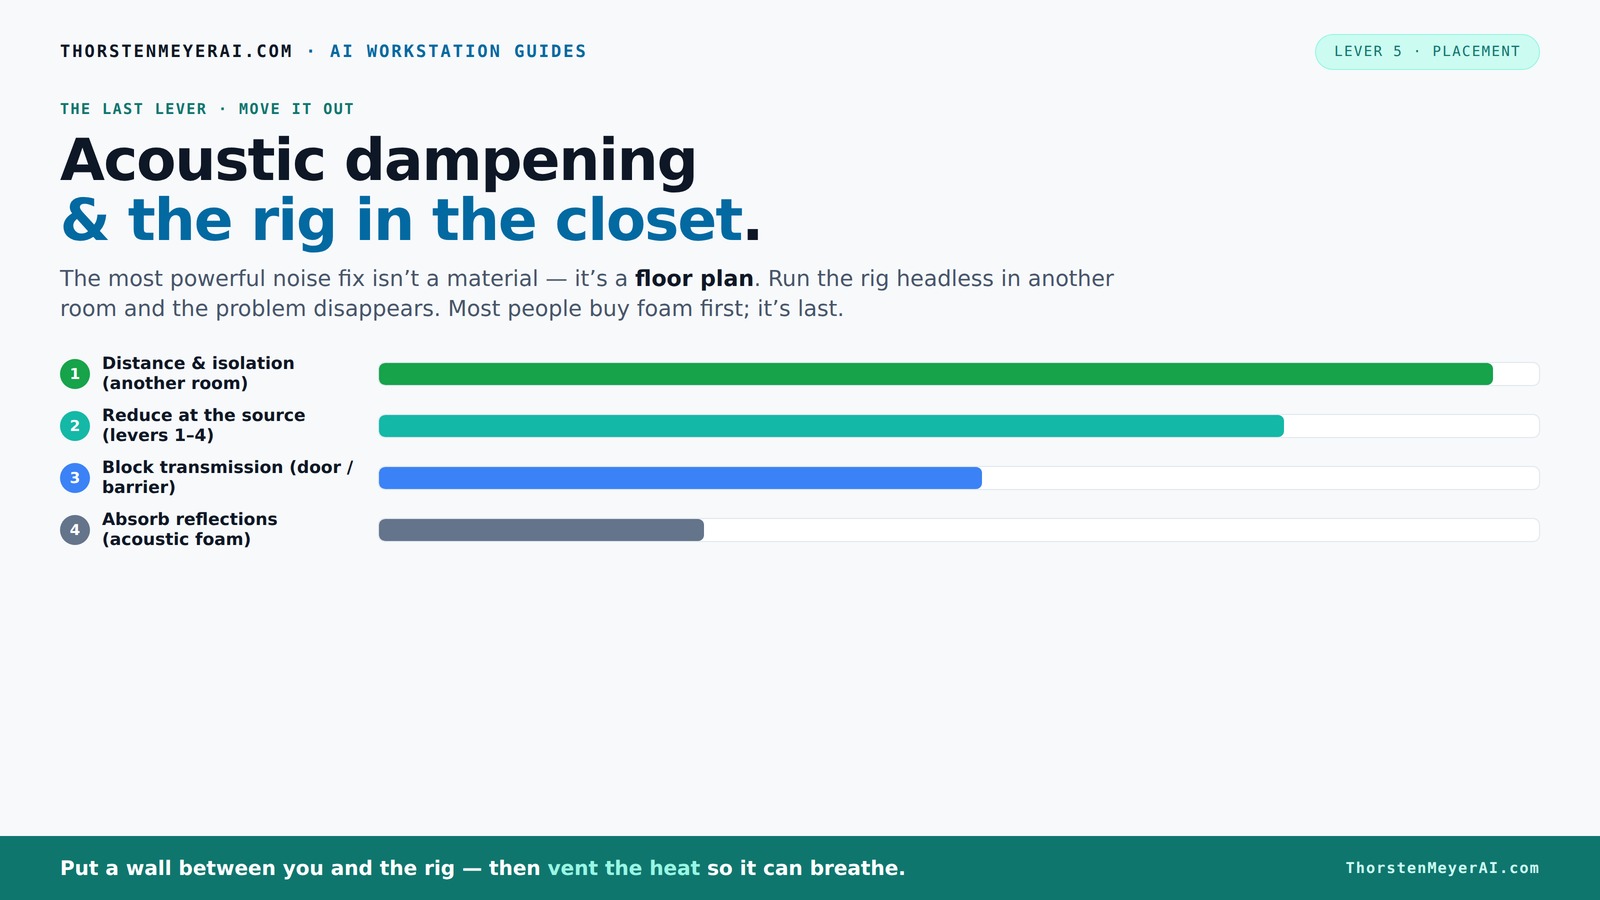
Acoustic dampening
& the rig in the closet.
The most powerful noise fix isn’t a material — it’s a floor plan. A rig you can’t hear because it’s in another room beats any amount of foam. Tap the approaches in Part 1 to see what actually works.
(another room)
(levers 1–4)
(door / barrier)
(acoustic foam)
Contain the noise, not the heat
Key Takeaways
- Prioritize placement and reflection control over just adding foam; positioning your mic and damping points matter most.
- Thick, absorptive materials outperform decorative foam for reducing harsh reflections in small spaces.
- Seal gaps around doors and windows to cut noise leakage; overlapping foam around door frames is highly effective.
- Ventilation is critical—passive vents or quiet exhaust fans prevent heat buildup that can throttle your rig.
- Bass traps are useful if you notice low-end resonance or boominess, but don’t overdo it in tiny closets.

Focusound 52 Pack Acoustic Foam Panels 1" x 12" x 12" Sound Proof Foam Panles Soundproofing Noise Cancelling Wedge Panels for Home Office Recoding Studio with 300PCS Double-Side Adhesive
Soundproofing - Acoustic foam panels triangular grooves structure for better noise absorption, helps to reduce and absorb unwanted...
As an affiliate, we earn on qualifying purchases.
As an affiliate, we earn on qualifying purchases.
Why Your Closet Isn’t Just a Dirty Secret — It’s a Sound Treasure Trove
Your closet can be a secret weapon for sound. Unlike big rooms, it has fewer surfaces for sound to bounce around. You might also consider acoustic dampening placement strategies. But tiny spaces trap reflections, creating harsh echoes and muddy recordings. The key is understanding the difference between dampening and soundproofing.
Think of dampening as softening echoes inside. Soundproofing is blocking noise from escaping or entering. In a closet, your goal is to reduce harsh reflections and control resonance, not necessarily block all outside sound. A well-treated closet can cut reverb by over 50%, making your voice sound crisp and clear, without the need for hefty soundproof barriers.
Understanding this distinction matters because it influences your treatment choices. Over-insulating can deaden your sound excessively, causing a dull or 'boxy' tone, while insufficient dampening leaves echoes that muddy recordings. The tradeoff is balancing absorption with a natural sound. Properly dampened spaces preserve clarity while controlling unwanted reflections, which is crucial for professional-sounding audio.

8 Pack - Bass Traps Acoustic Foam Corner, 8''x8''x12'' Black Bass Traps Corner Studio Foam, High Density and Fire-Proof Acoustic Panels Recording Studio Acoustical Treatments
Acoustic Principle- Bass Trap is a kind of sound absorbing structure specially used to absorb specific low-frequency standing...
As an affiliate, we earn on qualifying purchases.
As an affiliate, we earn on qualifying purchases.
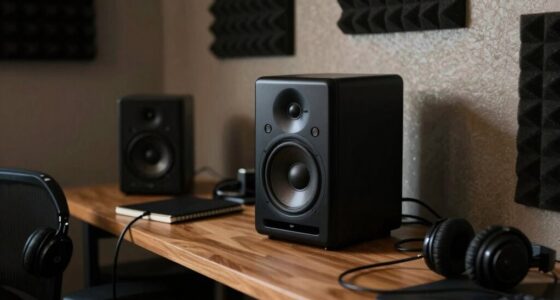
How to Position Your Microphone and Gear for the Best Sound
Placement is everything. In a tiny closet, the goal is to minimize reflections right at the source. For more tips, see placement and acoustic dampening techniques. Start by placing your mic about 6-12 inches from your mouth, pointing toward your face, not the wall. This distance helps balance proximity effect and reduces capturing room sound, which can muddy your recording. The closer you are, the more direct sound you get, and the less room ambiance is picked up, but too close can cause unwanted plosives or muffling.
Next, consider where your reflections come from. Place a soft material behind the mic — like a foam panel or blanket — to absorb direct reflections bouncing from behind or to the sides. Treating the wall directly behind the mic reduces the chance of sound bouncing back into the capsule, which can cause comb filtering or a hollow tone. Also, treat the wall opposite your mic if it’s hard and reflective, as sound tends to bounce forward and back, creating phase issues and muddiness.
For gear, keep cables tidy and avoid placing noisy equipment near your mic. Think of your setup as a mini studio: the more you control the immediate environment, the cleaner your recordings will be. Experiment with mic angles and distances to find the sweet spot that captures your voice clearly without unwanted room reflections.

VEVOR Portable Vocal Booth, 6.56 ft Height, Portable Recording Studio with Travel Bag, Mobile Tablet Stand, Thickened Soundproofing, Sound Isolation Booth for Echo-Free Vocals, Podcasts, Voiceovers
Say Goodbye to Echoes: Built with durable Oxford cloth and acoustic padding, this recording booth for the home...
As an affiliate, we earn on qualifying purchases.
As an affiliate, we earn on qualifying purchases.
Treat the Walls, Door, and Ceiling — The Real Small-Space Secrets
Small rooms need targeted treatment. Focus on the main reflection points: behind the mic, the wall opposite it, and the ceiling. You can learn more about effective acoustic dampening placement here. Use thick foam, panels, or even blankets stretched over frames. The goal is to absorb sound waves before they bounce back, which reduces echo and creates a more controlled environment. For example, placing a foam panel directly behind your mic helps prevent sound from bouncing off the wall behind you and re-entering the capsule, ensuring your voice remains focused and clear.
For the door, sealing gaps with weatherstripping or acoustic seals stops sound from leaking out or in. Overlapping foam around the door frame creates a tighter seal, reducing both noise and reflections that can escape through gaps. This prevents external noise from bleeding into your recordings and keeps your sound contained within the space.
Don’t forget the floor. A thick rug or carpet cuts down on slap echoes and flutter echoes, which can make your recordings sound ‘boxy’ or overly reverberant. Together, these treatments tame harsh reflections and give your voice that professional sheen. Remember, the goal is to control the most problematic reflection points without over-treating, which can deaden the space excessively.

Weather Stripping Door Seal Strip - Soundproof Q-Shaped Foam for Exterior Door Frame, Large Gap Seal, Noise Cancelling, Easy to Install (Black, 26FT)
No light penetration: Our door seals are made of high-density foam core material, which effectively blocks light from...
As an affiliate, we earn on qualifying purchases.
As an affiliate, we earn on qualifying purchases.
Bass Traps and Reflection Control — Do You Need Them in a Closet?
In tiny spaces, low frequencies can build up and cause boominess, which makes recordings sound muddy and less defined. Consider adding bass traps if needed. Bass traps are thick, dense panels placed in corners, especially where two surfaces meet, designed to absorb these problematic low-end sounds. But do you need them? It depends on your specific sound issues and goals.
If your recordings sound boomy, or if you notice uneven bass response when listening back, adding bass traps can help create a more balanced, natural sound. For most home closet rigs, placing a bass trap in the corner behind your mic or near the floor can make a noticeable difference by reducing low-frequency buildup that causes muddiness or “honkiness.”
However, in very small spaces, too much bass trapping can make the room sound overly dead, diminishing the natural warmth and liveliness of your recordings. The tradeoff is between controlling excessive low-end resonance and maintaining a lively, natural sound. Start with basic foam or panel treatments and add bass traps selectively, listening carefully to how they change your sound. Over-trapping can hinder clarity, so it’s about finding the right balance for your space and voice.
Ventilation and Heat — Keep Your Closet Rig Cool and Safe
A sealed closet is a recipe for heat buildup, which can damage your gear and affect your comfort. Proper ventilation is essential to keep your rig safe and cool. High-performance machines generate significant heat—hundreds of watts in some cases—and in a small, enclosed space, this heat can quickly turn your setup into a sauna. Overheating can cause hardware to throttle performance or fail prematurely, and high temperatures can also affect your recordings by causing equipment noise or distortion.
The key is proper ventilation. Passive vents — small holes or mesh panels — allow hot air to escape and cooler air to enter, creating a natural airflow that prevents heat from accumulating. For more effective cooling, install a quiet exhaust fan that gently pulls hot air out while drawing in fresh air. This setup keeps your hardware operating within safe temperature ranges and minimizes noise introduced by cooling fans.
For sealed, soundproof cabinets, look into models with built-in temperature regulation and ducted airflow systems designed specifically for audio gear. These systems balance the need for sound isolation with effective heat dissipation, ensuring your rig stays cool and quiet during long sessions. Proper ventilation isn’t just about comfort — it’s essential for maintaining the longevity and performance of your equipment. Check out the heat and noise reduction guide for detailed options and setup ideas.
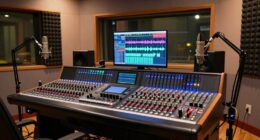
The Real Trick: Combining Dampening, Placement, and Ventilation
Achieving great sound in a closet isn’t about relying on a single fix; it’s a coordinated effort of placement, dampening, and airflow management. Think of it as tuning a musical instrument — each element influences the overall tone and clarity. Proper mic placement ensures your voice is captured cleanly, while targeted treatment at reflection points reduces echo and muddiness. Sealing gaps around the door prevents sound leakage and reflections from escaping, and ventilation keeps the environment stable and safe from heat buildup. If necessary, adding bass traps helps control low-end resonance, smoothing out the frequency response.
Each aspect has tradeoffs: over-treating can deaden your sound, while insufficient treatment leaves reflections and echoes. Balancing these elements requires understanding your space and listening carefully. The goal is to create an environment that is both acoustically controlled and physically safe. When these elements work together, your closet can rival a professional studio in clarity and noise control, without the need for expensive, complex solutions.
Remember, the ultimate aim is to *reduce echo* and *manage heat*, not just fill the space with foam. Smart placement, effective dampening, and proper airflow are the keys to a sustainable, high-quality setup that keeps your gear safe and your sound professional.
Frequently Asked Questions
What’s the best way to reduce echo in a tiny closet studio?
Use thick, absorptive materials like foam panels or blankets placed at reflection points—behind the mic, on the ceiling, and opposite the mic. Focus on treating the main surfaces that bounce sound back to the mic for the biggest impact.Do I need bass traps in such a small space?
If your recordings sound boomy or you notice uneven low frequencies, adding bass traps in corners or near the floor can help. For most home closet setups, start with basic foam and add traps only if necessary.How can I keep my closet rig cool without making noise?
Install passive vents or a quiet exhaust fan to ventilate hot air. For sealed cabinets, consider models with built-in temperature control and ducted airflow. Proper ventilation prevents overheating and noise from fans or throttling.What’s the biggest mistake people make with closet rigs?
Many focus solely on foam and forget about placement and ventilation. Ignoring heat buildup or reflection points leads to muddy recordings or overheating, which can damage your gear and ruin your sound.Can I use moving blankets instead of foam panels?
Yes. Moving blankets are thick and absorbent, making them a good substitute for foam in small spaces. Just ensure they’re properly hung around reflection points and sealed around the door for best results.Conclusion
Your closet can become a surprisingly effective audio space—if you treat it wisely. Focus on placement, absorption, and airflow, and you'll turn noise and reflections into clarity and warmth. It’s not just about soundproofing; it’s about making your small space work for you, quietly and efficiently.
Think of your closet as the backstage of your audio setup—hidden, yet vital. With the right tweaks, it won’t just hold your gear; it’ll elevate your sound to professional levels. So, get those blankets, seal those gaps, and breathe easy—your perfect audio haven is closer than you think.