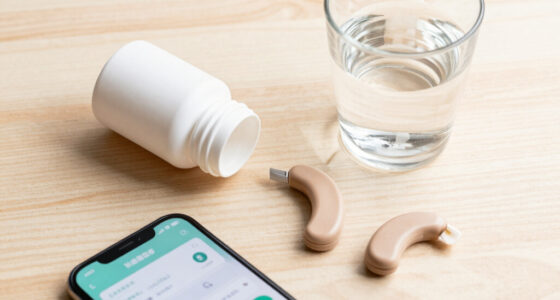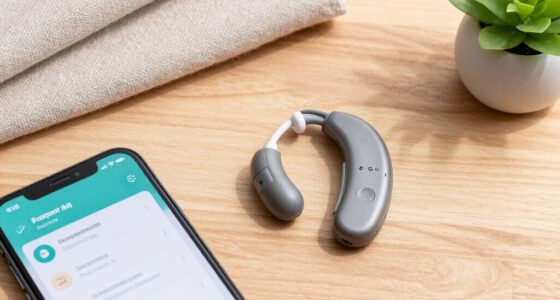
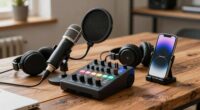
This guide provides step-by-step instructions for setting up and using assistive listening devices (ALDs) for students. It is intended for teachers, caregivers, or school staff responsible for supporting students with hearing difficulties. Completing this task correctly improves the student’s ability to hear clearly in classroom environments, enhancing participation and learning outcomes. The process includes selecting appropriate devices, configuring them properly, and troubleshooting common issues.
Listen free for 30 days with Audible
Thousands of audiobooks and originals — cancel anytime.
Start your free trialAs an affiliate, we earn on qualifying purchases.

Avantree Audiplex MX Multi-Channel Assistive Listening System with Transmitter and Receivers
- ✔ Channels Supported: 4
- ✔ Latency: 30ms
- ✔ Wireless Transmission: 2.4G
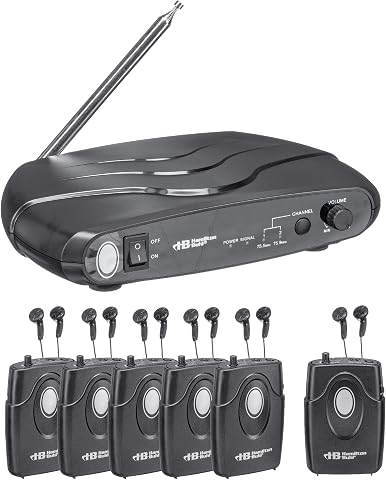
Hamilton Buhl Assistive Listening Dual Frequency System ALS700 with Transmitter, 6 Receivers & Earbuds
- ✔ Power Source: Corded Electric
- ✔ Includes: Transmitter, 6 Receivers, Earbuds, Carry Case
- ✔ Weight: 5 Pounds

Listen Technologies LR-4200-072 Intelligent DSP RF Receiver 72 MHz with OLED Display and T-Coil Compatibility
- ✔ Channels: 17 Wide Band, 40 Narrow Band (57 Total)
- ✔ Sensitivity: 0.6 uV Typical, 1 uV Max
- ✔ Squelch: Programmable 20 Steps
Difficulty: Intermediate | Time: 30-60 minutes
What You’ll Need
Tools & Materials:
- Assistive listening device (e.g., FM system, infrared system, Bluetooth headset)
- Batteries or power source
- User manual for the device
- Optional: sound level meter
Knowledge:
- Basic understanding of hearing assistive technology
- Familiarity with classroom audio setup
Check with the student or audiologist for the specific device type and model recommended. Ensure the device is compatible with existing classroom audio systems if applicable.
Avantree Audiplex MX Multi-Channel Assistive Listening System with Transmitter and Receivers
<p>The <strong>Avantree Audiplex MX</strong> stands out for its support of up to four channels, making it ideal for schools or large venues where multiple groups or activities occur simultaneously. Its impressive <strong>100-meter wireless range</strong> ensures coverage across medium-sized classrooms or auditoriums. The system is designed for larger groups, with support for up to 10 receivers (expandable), enabling multiple students to listen clearly without interference. Compared with wired systems, it offers greater mobility and less clutter, but setup can be more complex due to device pairing and configuration. This pick is best suited for environments where flexibility and scale matter most, though additional receivers may be needed for very large groups.</p>
Pros:
- Supports multiple channels to prevent audio interference
- Long wireless range of 100 meters suitable for large spaces
- Expandable system accommodates growing groups
- Low latency ensures real-time audio for live lessons
Cons:
- Requires setup and pairing of multiple devices
- Limited to 10 receivers included, additional purchases needed for larger groups
- Setup complexity might be a barrier for some users
Best for: Large classrooms or school auditoriums with multiple students needing simultaneous listening support
Not ideal for: Small groups or environments where simplicity and minimal setup are prioritized
Bottom line: Optimal for large venues seeking scalable, interference-free wireless listening, with some initial setup effort.
“Optimal for large venues seeking scalable, interference-free wireless listening, with some initial setup effort.”
Hamilton Buhl Assistive Listening Dual Frequency System ALS700 with Transmitter, 6 Receivers & Earbuds
<p>The <strong>Hamilton Buhl ALS700</strong> provides a straightforward wired solution for smaller groups or classroom settings where mobility is less critical. Its inclusion of six receivers and earbuds makes it easy for multiple students to follow along in environments like theaters or speech therapy classes. The system’s <strong>150-foot range</strong> offers decent coverage, and its fully ADA-compliant design ensures accessibility. However, the wired connection limits movement, making it less suitable where students need to move around freely. The weight of about 5 pounds can also be cumbersome, and the earbuds may not fit all ear sizes comfortably. This system is best for controlled environments where ease of use outweighs the need for wireless flexibility.</p>
Pros:
- Supports multiple users simultaneously within 150 feet
- Fully ADA compliant and suitable for diverse environments
- Includes a carry case for portability
- Simple wired setup with minimal configuration
Cons:
- Requires wired connection, limiting mobility
- Weight of 5 pounds may be cumbersome
- Earbuds may not fit all users comfortably
Best for: Smaller classrooms or settings where portability and simplicity are key
Not ideal for: Large venues or situations requiring high mobility and wireless use
Bottom line: Ideal for small, controlled environments where straightforward wired connectivity suffices, but less adaptable for active or large settings.
“Ideal for small, controlled environments where straightforward wired connectivity suffices, but less adaptable for active or large settings.”
Listen Technologies LR-4200-072 Intelligent DSP RF Receiver 72 MHz with OLED Display and T-Coil Compatibility
<p>The <strong>Listen Technologies LR-4200-072</strong> is tailored for environments that demand high audio clarity and advanced features. Its compact design makes it comfortable for students or conference attendees to wear all day. With an <strong>OLED display</strong> for easy channel and battery status monitoring, plus noise reduction technology, it ensures clear speech even in noisy settings. The T-coil compatibility enhances accessibility for hearing aid users, making it a versatile choice for schools and conference centers. Its focus on high-quality audio and portability makes it ideal for professional or multi-purpose venues, but its single-channel operational focus means it isn’t suitable for large groups needing multiple channels simultaneously. Limited to the 72 MHz frequency, it might face interference in some venues.</p>
Pros:
- Compact, lightweight design for all-day comfort
- OLED display provides clear info on channels and battery
- Rechargeable battery lasts up to 8 hours
- T-coil compatibility enhances hearing aid accessibility
Cons:
- Designed primarily for single-channel use
- Limited to 72 MHz frequency, potential interference issues
- Requires micro USB for charging and setup
Best for: Students or conference attendees requiring high-quality, portable listening devices
Not ideal for: Large groups or settings requiring multi-channel support
Bottom line: Best suited for individual users or small groups prioritizing high fidelity and portability over multi-channel capacity.
“Best suited for individual users or small groups prioritizing high fidelity and portability over multi-channel capacity.”
As an Amazon Associate we earn from qualifying purchases.
Before You Start
Verify that the device is charged or has fresh batteries. Confirm the device is clean and undamaged. Gather all necessary components and locate the user manual. Ensure the classroom environment is suitable for testing sound levels before beginning the setup.
Step-by-Step Instructions
Step 1: Identify the appropriate assistive listening device
Select the device recommended for the student, considering their specific hearing needs and classroom environment.
Tip:Consult with the student’s audiologist or special education team to choose the most suitable device type (e.g., FM, infrared, Bluetooth).
Check: You have selected a device compatible with the student’s hearing aid or cochlear implant and appropriate for the classroom setting.
Step 2: Prepare the device for use
Insert batteries or connect the device to its power source according to the manufacturer’s instructions.
Tip:Double-check that batteries are correctly oriented and fully charged.
Check: The device powers on without error messages and indicates readiness (e.g., LED lights or sound signals).
Step 3: Connect the device to the student’s hearing aid or cochlear implant
Attach the receiver or transmitter to the student’s hearing device, or ensure wireless pairing if applicable.
Tip:Follow the manufacturer’s pairing instructions carefully to avoid connection issues.
Check: The student’s hearing device receives audio signal clearly, with no static or dropouts.
Step 4: Test the device’s sound transmission
Play a sound source (e.g., a test tone or classroom audio) and confirm the student can hear it clearly through the device.
Tip:Ask the student if the audio is clear, and adjust volume levels if necessary.
Check: The student reports clear, consistent sound without background noise or static.
Step 5: Adjust the device settings for optimal hearing
Set the volume to a comfortable level for the student, avoiding excessive loudness.
Tip:Use a sound level meter if available to ensure levels are within safe and effective ranges.
Check: The student indicates the audio is comfortably loud and clear, with no distortion.
Step 6: Position the device appropriately in the classroom
Place the microphone or transmitter close to the sound source (e.g., teacher’s voice) for best transmission.
Tip:Avoid obstructions or placing the microphone near noise sources to reduce background interference.
Check: The student consistently hears the teacher or sound source with clarity during a classroom activity.
Step 7: Train the student and staff on device use
Explain how to operate, turn on/off, and troubleshoot the device to the student and relevant staff.
Tip:Provide written instructions or quick reference guides as needed.
Check: The student and staff can independently operate the device during classroom activities.
Step 8: Monitor and adjust during use
Observe the student’s response and make adjustments to volume or positioning if needed.
Tip:Regularly check the device’s functioning throughout the day to prevent issues.
Check: The student reports consistent, clear hearing, and the device remains functional during use.
Common Mistakes to Avoid
- Using a device incompatible with the student’s hearing aids — Confirm device compatibility with the audiologist before purchase and setup.
- Not testing sound levels before classroom use — Always conduct a thorough test of audio transmission and volume adjustment prior to the student using the device.
- Placing the microphone or transmitter far from the sound source — Position the microphone close to the teacher or sound source for optimal transmission.
- Failing to train staff and students on device operation — Provide clear instructions and demonstrations, and confirm understanding before use.
Troubleshooting
Problem: Student reports no sound or static noise
Solution: Check the device’s power source and connections. Re-pair or reattach the transmitter and receiver as needed. Replace batteries if weak.
Problem: Audio cuts in and out during use
Solution: Ensure the device is within range, avoid obstructions, and verify Bluetooth or wireless pairing stability. Move closer if necessary.
Problem: The device is on but the student cannot hear clearly
Solution: Adjust volume settings, check for obstructions, and verify the microphone is positioned correctly near the sound source.
What Success Looks Like
The student consistently hears speech and classroom sounds clearly through the device, reports comfort, and shows improved participation during lessons.
Next Steps
Regularly check and maintain the device, replace batteries as needed, and document the student’s progress. Reassess the device setup after any classroom changes or if issues arise. Coordinate with audiologists for ongoing support.
Frequently Asked Questions
How do I know which assistive listening device is best for my student?
Consult with an audiologist or special education team to select a device tailored to the student’s hearing needs, classroom environment, and compatibility with existing equipment.
Can I use the same device for multiple students?
Devices are typically personalized; using a device with a different student may cause issues or compromise hygiene. Have individual devices assigned to students as recommended.
How often should I test the device during the school day?
Perform quick checks at least once per day to confirm proper operation, especially before lessons or activities where hearing is critical.
What if the device interferes with other classroom electronics?
Use devices with different frequencies or channels to avoid interference. Test the setup before use and adjust positioning if needed.
Fall Picks
fall essentials
As an affiliate, we earn on qualifying purchases.