To guarantee clean narration every time, position your microphone close to your mouth, about 2-6 inches away, and slightly above or below your lips, pointing directly at them. Use a pop filter and keep the mic away from reflective surfaces like walls or windows. Adjust the angle and distance with small changes and do test recordings to fine-tune your setup. Keep learning the best placement tips for consistently professional sound quality.
Key Takeaways
- Position the microphone close to your mouth, about 6-12 inches, to capture clear sound and reduce background noise.
- Aim the mic slightly above or below your lips, pointing directly at them, to minimize plosive sounds.
- Use a pop filter or windscreen to prevent pops and improve audio clarity during narration.
- Ensure consistent placement with a boom arm or stand for uniform sound quality across recordings.
- Conduct test recordings to fine-tune placement, adjusting for optimal sound and minimal background noise.

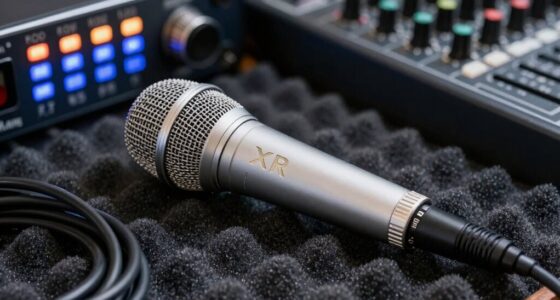
Are you wondering how to position your microphone for the clearest narration? The way you place your microphone can make a huge difference in the quality of your recordings. First, understand that different microphone types—such as dynamic, condenser, and lavalier—have unique characteristics that influence how you should position them. For example, condenser mics are more sensitive and pick up a broader range of frequencies, so they often require careful placement to avoid capturing unwanted room noise. Dynamic microphones, on the other hand, are less sensitive and better at rejecting background noise, making them more forgiving in less controlled environments. Knowing your microphone type helps you determine the best placement to achieve clean, professional narration. Additionally, understanding bank SWIFT/BIC codes can be crucial if you need to make international payments for equipment or services related to your recording setup.
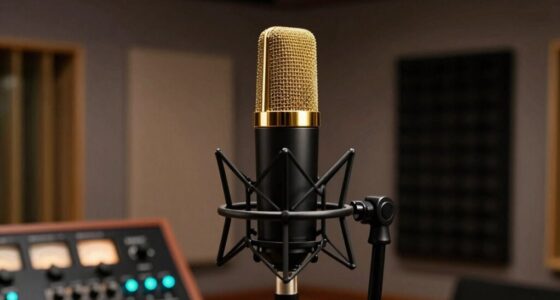
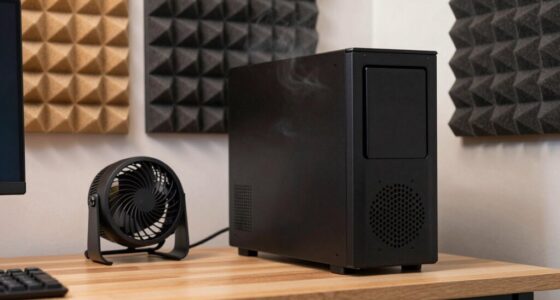
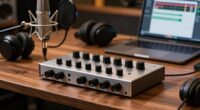
Soundproofing techniques are equally important when positioning your microphone. Even the best mic can pick up unwanted echo, background chatter, or environmental noise if your space isn’t properly soundproofed. Simple soundproofing techniques, like adding foam panels, thick curtains, or rugs, can minimize reflections and absorb excess noise. When positioning your microphone, try to keep it as close to your mouth as possible without causing distortion. This reduces the need for high gain levels, which can amplify background noise. Use a pop filter or windscreen to prevent plosive sounds from hitting the microphone directly, ensuring your narration remains clear and crisp. Proper microphone placement is especially essential in spaces with reflective surfaces, as sound reflection can significantly impact audio quality.
Effective soundproofing and close mic placement ensure clear, professional narration free from unwanted noise.
Another key aspect is the angle and height of the microphone. You’ll want to position it slightly above or below your mouth, pointing directly at your lips, to capture your voice accurately while avoiding breathing noises. Keep the microphone consistent in its placement relative to your mouth for every recording session to maintain uniform sound quality. If you’re recording in a space with reflective surfaces, position your mic away from walls and windows, and consider using soundproofing techniques to dampen any echo. Using a boom arm or adjustable stand allows you to fine-tune the mic’s position effortlessly, ensuring you’re always in the most suitable spot for clear narration.
Finally, always do a quick test recording before starting your actual narration. Listen carefully for any background noise, pops, or uneven sound levels. Adjust your microphone position accordingly, and remember that small changes in distance or angle can greatly improve audio clarity. By understanding your microphone’s type, applying effective soundproofing techniques, and positioning it thoughtfully, you’ll consistently produce clean, professional narration every time.

Aokeo Professional Microphone Pop Filter Mask Shield For Blue Yeti and Any Other Microphone,Mic Dual Layered Wind Pop Screen With Flexible 360° Gooseneck Clip Stabilizing Arm
Double Layered Screen Pop Filters:The first screen blocks air blasts as any pop filter normally would; The gap…
As an affiliate, we earn on qualifying purchases.
As an affiliate, we earn on qualifying purchases.
Frequently Asked Questions
What Type of Microphone Is Best for Narration?
You should choose a condenser microphone for narration, as it captures voice modulation with clarity and warmth. It’s essential to maintain your equipment regularly to guarantee top audio quality. Keep the microphone clean, check connections, and replace damaged cables. Proper placement also helps, but selecting the right mic makes a considerable difference in achieving professional, clean narration every time. Regular maintenance and proper technique will enhance your recordings markedly.
How Do I Prevent Popping Sounds While Narrating?
Did you know that over 30% of audio issues stem from popping sounds? To prevent these, focus on equipment maintenance and proper voice modulation. Keep a pop filter or windscreen close to your microphone, and position it slightly off-axis to your mouth. Consistently monitor your equipment, and control your breathing and speech pace. These steps help reduce plosives, ensuring clean narration and professional sound quality every time.
Should I Use a Pop Filter or Windscreen?
You should use a pop filter or windscreen as essential microphone accessories for clear narration. Pop filters effectively reduce plosive sounds, while windscreens minimize wind or breath noise. Incorporate these into your recording techniques to guarantee cleaner audio. Using both can provide the best results, especially in professional settings. Their strategic placement helps prevent unwanted pops and noise, making your narration sound crisp and professional every time.
How Far Should the Microphone Be From My Mouth?
Perfect placement prevents popper problems and paves the path for pristine sound. Keep your microphone about six to twelve inches from your mouth, adjusting for voice modulation and vocal volume. Too close, and you risk distortion; too far, and your voice may fade. Find that sweet spot where your speech sounds smooth, steady, and clear. Proper microphone placement empowers your narration, ensuring your voice vibrates vividly without unwanted noise or interference.
What Room Environment Is Ideal for Narration?
Choose a quiet room with good acoustics, like a small, carpeted space with soft furnishings, to minimize background noise and echo. Avoid rooms with hard surfaces that cause reflections, which can muddy your narration. Use sound-absorbing materials like curtains or foam panels if needed. This environment helps your microphone capture clear, professional-quality audio by reducing unwanted background noise and ensuring your voice sounds natural and crisp.

InnoGear Microphone Stand, Tripod Boom Arm Floor Mic Stand Height Adjustable Heavy Duty with Carrying Bag 2 Mic Clips 3/8" to 5/8" Adapter for Singing Podcast for Blue Yeti Shure SM58 SM48 Samson Q2U
Adjustable Height & Solid: The height of the microphone stand with boom arm is adjustable from 28.1 inches…
As an affiliate, we earn on qualifying purchases.
As an affiliate, we earn on qualifying purchases.
Conclusion
By following these microphone placement tips, you’ll find your narration sounding as clear and polished as a diamond. Think of your microphone as a trusted friend, always ready to catch your voice at its best. With the right placement, your words will flow smoothly, free from unwanted noise or echoes. Remember, a well-placed mic is the bridge that connects your voice to your audience, turning simple speech into a mesmerizing storytelling journey.
Audio-Technica AT2020 Cardioid Condenser Studio XLR Microphone, Ideal for Project/Home Studio Applications, Black
The price/performance standard in side address studio condenser microphone technology
As an affiliate, we earn on qualifying purchases.
As an affiliate, we earn on qualifying purchases.

Focusound 52 Pack Acoustic Foam Panels 1" x 12" x 12" Sound Proof Foam Panles Soundproofing Noise Cancelling Wedge Panels for Home Office Recoding Studio with 300PCS Double-Side Adhesive
Soundproofing – Acoustic foam panels triangular grooves structure for better noise absorption, helps to reduce and absorb unwanted…
As an affiliate, we earn on qualifying purchases.
As an affiliate, we earn on qualifying purchases.