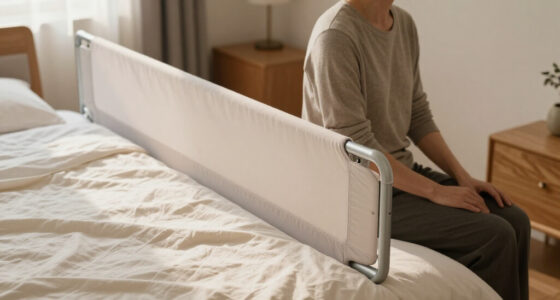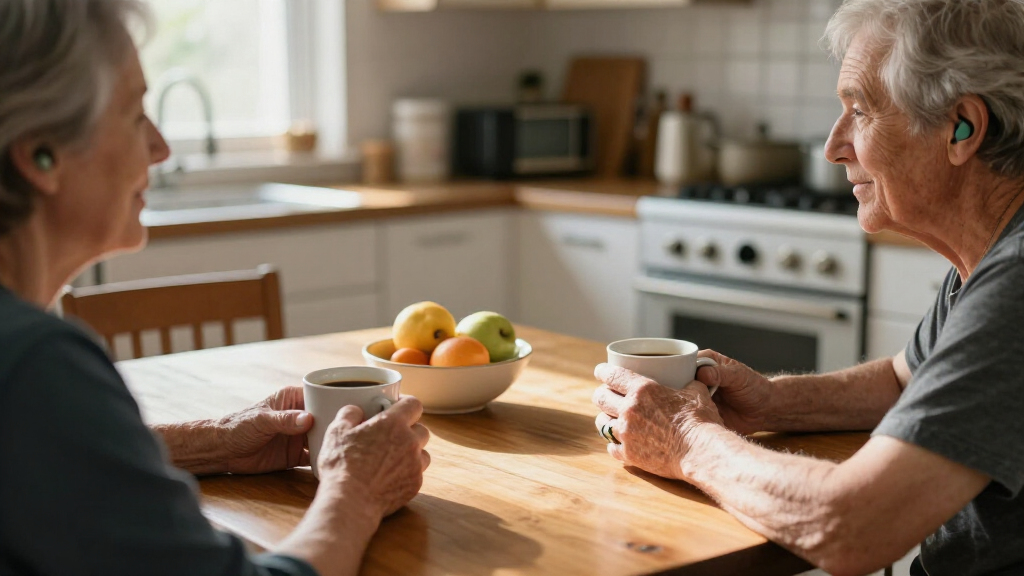

This guide helps adults choose and set up a hearing amplification device, such as a personal sound amplification product (PSAP), for situations where they need added volume. It is for beginners who want to hear environmental sounds more clearly, such as conversation in a quiet room. You will learn how to check whether a device fits your needs, start at a comfortable volume, and spot signs that you need a hearing evaluation instead. Allow 30-60 minutes for research and setup, then several days to adjust gradually.

Get everyday helpers delivered free with Prime
- Fast, free delivery on millions of items
- Prime Video, Amazon Music and more included
- Member-only deals all year

Rechargeable Personal Hearing Amplifier with Directional Microphone
- ✔ Maximum sound gain: 65 dB
- ✔ Battery life: Up to 120 hours
- ✔ Charging time: About 1 hour
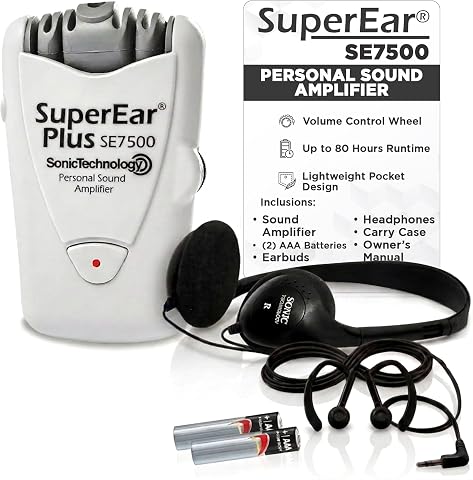
SuperEar Plus SE7500 Personal Sound Amplifier
- ✔ Model: SE7500
- ✔ Ambient sound gain: Up to 50+ dB
- ✔ Battery life: Up to 80 hours
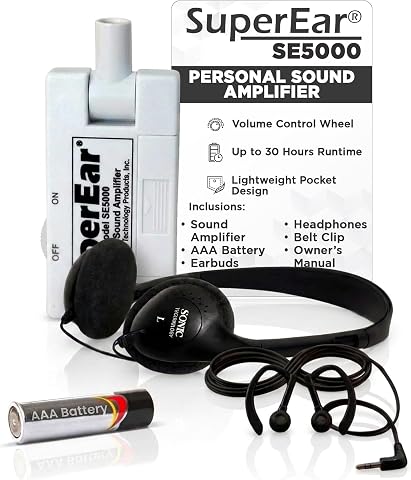
SuperEar SE5000 Personal Sound Amplifier with Headphones and Earbuds
- ✔ Amplification: Up to 50+ dB
- ✔ Battery life: Up to 30 hours
- ✔ Battery type: 1 AAA battery included
Difficulty: Beginner | Time: 30-60 minutes for setup, followed by several days of gradual adjustment
What You’ll Need
Tools & Materials:
- A hearing amplification device with its instructions
- The correct batteries or a charged battery
- A quiet room for fitting and initial testing
- A notebook or phone for recording settings and questions
Knowledge:
- Basic ability to insert and remove an ear-worn device, if applicable
- Awareness of any hearing changes, ear symptoms, or situations where hearing is difficult
Hearing amplifiers increase sound; they do not diagnose or treat hearing loss. If hearing difficulty is new, worsening, one-sided, or accompanied by pain, drainage, dizziness, ringing, or a sudden change, contact a healthcare professional. Sudden hearing loss needs urgent medical attention. A hearing care professional can check for treatable causes and recommend whether a prescription hearing aid is more suitable.
Rechargeable Personal Hearing Amplifier with Directional Microphone
This model stands apart from the SuperEar devices by pairing automatic gain control with a directional microphone. The stated design aims to focus on voices and reduce background noise, a potentially useful distinction in conversation settings where simply raising every surrounding sound may not help. Its stated 65 dB maximum gain is higher than the up-to-50+ dB figures listed for the SuperEar models, though gain alone does not establish speech clarity or suitability for a particular listener.Convenience is another point of difference: it is rechargeable, with a stated one-hour charge and up to 120 hours of use. That avoids routine AAA replacement and exceeds the SE7500’s listed 80 hours and SE5000’s 30 hours. The tradeoff is limited setup information. We are not told its fit style, what accessories come in the box, or which charging connector it uses, so buyers have less to assess before choosing. It is still an amplifier, not individualized hearing correction.
Pros:
- Directional microphone is designed to focus on voices and reduce background noise
- Automatic gain control adjusts amplification as sound levels change
- Rechargeable design lists up to 120 hours of use and a one-hour charge
- Single knob keeps power and volume control simple
Cons:
- Fit and comfort details are not provided
- Charging connector and included accessories are unspecified
- Amplification does not provide individualized hearing correction
Best for: Listeners seeking a rechargeable amplifier with stated speech-direction features and simple knob controls.
Not ideal for: Buyers who need confirmed ear fit, detailed accessory information, a specified charging connector, or hearing correction.
Bottom line: We’d start here for its speech-focused microphone and rechargeable runtime, provided the missing fit and charging details can be confirmed.
“We’d start here for its speech-focused microphone and rechargeable runtime, provided the missing fit and charging details can be confirmed.”
SuperEar Plus SE7500 Personal Sound Amplifier
The SE7500 earns its place through a clear, practical balance: up to 80 hours of battery life, adjustable volume, and both earbuds and headphones in the included kit. Compared with the SE5000, it promises substantially longer use between battery changes and adds a carry case with belt clip, making it the more convenient of the two for regular travel or keeping accessories together.Its appeal is straightforward rather than specialized. The description covers conversations, TV dialogue, meetings, and everyday listening, but does not describe a directional microphone or automatic gain control like the rechargeable pick. We should therefore see it as a general ambient sound amplifier with flexible listening options, not assume it will isolate speech in noisy surroundings. It uses two AAA batteries, so the long stated runtime still comes with battery replacement, and amplification is not hearing correction.
Pros:
- Up to 80 hours of stated battery life
- Includes earbuds, headphones, batteries, and a carry case with belt clip
- Adjustable volume for everyday listening situations
- Compact package is easier to keep together and carry than a bare device
Cons:
- Requires two AAA batteries
- No directional microphone or automatic gain feature is specified
- Amplifies sound rather than providing hearing correction
Best for: Someone who wants a ready-to-carry general amplifier with long stated runtime and a choice of earbuds or headphones.
Not ideal for: Listeners prioritizing rechargeable power, a directional microphone, or personalized hearing support.
Bottom line: We’d choose the SE7500 over the SE5000 when longer battery life and an included carry case matter more than rechargeable power or speech-direction features.
“We’d choose the SE7500 over the SE5000 when longer battery life and an included carry case matter more than rechargeable power or speech-direction features.”
SuperEar SE5000 Personal Sound Amplifier with Headphones and Earbuds
The SE5000 keeps the proposition simple: it captures and amplifies ambient sound, then lets us listen through either included stereo headphones or earbuds. That choice is useful if we want to adapt the setup to a particular listening preference. Its swivel microphone, adjustable volume wheel, and stainless steel belt clip also make it a portable, tactile option. Compared with the SE7500, however, its stated battery life is shorter—up to 30 hours rather than up to 80—and the description does not mention a carry case.This is also the least specialized choice in the lineup. The supplied information does not claim a directional microphone or automatic gain adjustment, so the rechargeable model is a better fit on paper for listeners seeking speech-focused features. The SE5000 can be used for TV listening, but it does not connect directly or wirelessly to a TV; it amplifies sound picked up by its microphone. That distinction matters if we want a direct audio feed. One AAA battery is included, but it will need replacing when depleted.
Pros:
- Includes both stereo headphones and earbuds
- Swivel microphone and volume wheel provide straightforward manual control
- Portable design includes a stainless steel belt clip
- One AAA battery is included
Cons:
- Up to 30 hours of stated battery life is the shortest in this comparison
- Does not connect directly or wirelessly to a TV
- Requires AAA battery replacement and has no stated rechargeable option
Best for: A buyer who wants a basic portable ambient amplifier and appreciates having both headphones and earbuds included.
Not ideal for: Someone who needs direct TV audio, a rechargeable device, long stated runtime, or a specified directional speech feature.
Bottom line: We’d choose the SE5000 for a simple, portable setup with two listening options, while accepting shorter runtime and no direct TV connection.
“We’d choose the SE5000 for a simple, portable setup with two listening options, while accepting shorter runtime and no direct TV connection.”
As an Amazon Associate we earn from qualifying purchases.
Before You Start
Decide where you want extra sound before comparing devices. A simple amplifier may help in specific situations, but it may also make background noise louder. Do not use an amplifier to compensate for hearing trouble that has not been evaluated, and do not turn the volume high to force speech to sound clear. Read the device’s safety instructions, including its cleaning and battery guidance. Keep small batteries away from children and pets.
Step-by-Step Instructions
Step 1: Identify the situations where you need help
Write down two or three situations in which hearing is difficult, such as following one speaker at home, hearing a television at a lower volume, or listening to conversation in a quiet setting. Note whether the difficulty affects one ear or both, when it began, and whether it is getting worse. This list helps you judge whether an amplifier suits the task and gives a clinician useful information if you seek an evaluation.
Tip:Difficulty understanding speech in noise, frequent requests for repetition, or trouble hearing on the phone can point to needs that a basic amplifier may not address.
Check: You can describe the listening situations you want to improve and whether the problem is new or changing.
Step 2: Choose a device for your listening task
Compare devices based on where you will use them, how they fit, and whether they offer simple volume controls. For conversation across a table, a wearable device may be practical. For television, a dedicated listening system with headphones or a neck-worn receiver may keep sound close without raising the room volume. Check compatibility with your phone or other audio source before buying. Review return terms, warranty, cleaning needs, and battery type.
Tip:Do not assume a product labeled “hearing aid” is a regulated prescription hearing aid. Check the product description and ask a hearing professional if you are unsure what it is designed to do.
Check: The selected device matches a specific listening situation, fits your budget, and has instructions and support you can access.
Step 3: Prepare the device and your ears
Wash and dry your hands. Read the manufacturer’s fitting instructions, then charge the device or install the specified battery with the correct polarity. Inspect the ear tip or earpiece for damage and confirm that it is clean. If the device has detachable tips, choose the size recommended by its instructions; do not force a tip into your ear. Set the controls to their lowest level before putting it on.
Tip:Stop if your ear is sore, blocked, or irritated. A device should not be pushed deeply into the ear canal.
Check: The device powers on, the controls start at a low setting, and all parts are clean and intact.
Step 4: Fit the device and start at low volume
Insert or position the device as its instructions show. Keep the fit secure but comfortable; remove it and try again if it pinches or causes pressure. Turn it on at the lowest volume and listen in a quiet room. Raise the level one small step at a time until speech is audible and comfortable. If the device has separate settings for each ear, adjust them gradually and follow the maker’s guidance.
Tip:Feedback, such as whistling, can happen when a device is poorly seated or its microphone is covered. Reposition it before increasing the volume.
Check: You can hear a nearby speaker at a comfortable level without pain, strong whistling, or an urge to remove the device.
Step 5: Test it with familiar sounds and speech
Ask someone to speak with you at a normal volume from a few feet away, or use a familiar audio source at a low level. Test the device in the situation for which you chose it. Listen for clear, comfortable sound rather than maximum loudness. If speech becomes harsh, distorted, or tiring, reduce the volume or change the setting according to the instructions. Avoid testing with loud sounds.
Tip:A sound amplifier may make rustling, traffic, or room noise more noticeable. That does not mean you should raise the volume further.
Check: The target sound is easier to notice, remains comfortable, and is not overwhelmed by amplified background noise.
Step 6: Build use time gradually
Use the device for a short period in a calm setting, then remove it and check for discomfort or fatigue. If it feels comfortable, add time gradually over the next several days. Try one familiar setting at a time and keep a note of the volume, situation, and result. Remove the device if you develop pain, dizziness, a headache, or uncomfortable sound, and contact a professional if symptoms persist.
Tip:Do not wear an unfamiliar amplifier continuously on the first day. Gradual use makes it easier to notice whether the fit or sound level needs adjustment.
Check: You can use the device for your planned listening task without pain or lingering discomfort, and you can identify a comfortable setting.
Step 7: Clean, store, and review the result
Turn off the device and clean it only as directed by its manufacturer. Keep moisture, hair products, and earwax away from openings. Store it in its case in a dry place, and remove or handle batteries as the instructions specify. After several uses, review your notes. If the device does not help the intended situation, or if you keep needing louder settings, arrange a hearing assessment instead of continuing to increase volume.
Tip:Never rinse an electronic device or use alcohol or cleaning fluid unless its instructions say it is safe.
Check: The device is clean, stored safely, and you have a clear record of when it helps and when it does not.
Common Mistakes to Avoid
- Turning the volume up quickly to make speech clearer. — Start at the lowest level and increase in small steps. If speech still sounds unclear, lower the volume and seek a hearing evaluation rather than pushing the level higher.
- Using an amplifier to postpone evaluation of new or worsening hearing difficulty. — Arrange a hearing check when the change is new, progressing, one-sided, or affecting everyday communication. Seek urgent care for sudden hearing loss.
- Choosing a device without checking how it will be used or maintained. — Match the device to a specific setting, confirm fit and source compatibility, and read the return, cleaning, and battery instructions before use.
- Ignoring discomfort, feedback, or irritation. — Remove and refit the device at low volume. Stop using it if pain or irritation continues, and ask a hearing care professional for advice.
Troubleshooting
Problem: The device whistles or squeals.
Solution: Lower the volume, check that the earpiece is seated as instructed, and move hair or clothing away from the microphone. Clean the device as directed. If the sound continues, stop use and contact the seller or a hearing professional.
Problem: Speech is louder but still difficult to understand.
Solution: Lower the volume and test in a quieter room. Amplifiers increase sound but may not improve speech clarity. Arrange a hearing assessment to check your hearing and discuss suitable options.
Problem: The device feels painful, itchy, or blocked.
Solution: Remove it. Check for an incorrect or damaged ear tip and follow the fitting instructions before trying again. Do not insert it deeply or continue wearing it through pain. Seek professional advice if symptoms persist.
Problem: The device has little or no sound.
Solution: Check that it is charged or that the battery is installed correctly, the power is on, and the volume is above its minimum. Inspect openings for visible debris and clean only as instructed. Contact the manufacturer or seller if it still does not work.
What Success Looks Like
You have a device suited to a defined listening task, can fit and operate it comfortably at a low volume, and can hear the target sound more easily without pain or harsh loudness. You know how to clean and store it and have noted situations where it does not help. If hearing remains difficult, symptoms appear, or you need progressively more volume, a hearing care professional should assess your hearing.
Next Steps
Use your notes to decide whether the amplifier is helping in the situations you identified. Schedule a hearing test if everyday communication remains difficult, if the problem changes, or if you experience ear symptoms. Ask the clinician about the cause of the difficulty and whether a prescription hearing aid or another treatment is appropriate. Keep following the device’s care instructions and replace batteries or parts only as specified.
Frequently Asked Questions
Are hearing amplifiers the same as hearing aids?
No. Personal sound amplification products make sounds louder for particular situations. Prescription hearing aids are selected and adjusted to address hearing loss. A hearing professional can help determine which option fits your needs.
Can I use a hearing amplifier in both ears?
Follow the product’s instructions and use it only as designed. If you have trouble hearing in one ear, unequal hearing, or a recent change on one side, arrange an evaluation before relying on an amplifier.
How loud should I set the device?
Use the lowest setting that makes the intended sound easier to hear comfortably. Reduce the volume if sound becomes harsh or tiring. Do not use high volume to make unclear speech understandable.
When should I seek urgent medical help?
Seek urgent medical attention for sudden hearing loss, especially if it develops over hours or a few days. Contact a healthcare professional promptly for hearing changes with pain, drainage, dizziness, or other new symptoms.
Halloween Picks
halloween
As an affiliate, we earn on qualifying purchases.